As you explore excavation shoring techniques, you’ll find soldier pile and lagging panel systems deliver reliable support in tight or deep digs. These methods combine steel H-beams with timber, precast concrete or steel panels to hold back soil as you excavate. With the right approach, you’ll keep your project on schedule and your crew safe.
Soldier pile fundamentals
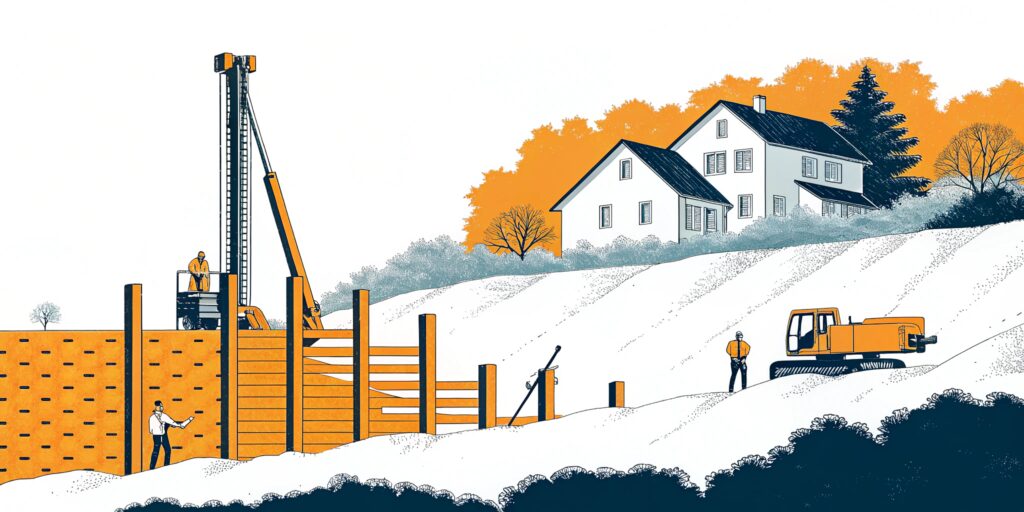
Soldier piles are steel H- or I-beams driven at regular intervals to form a load-bearing wall. You then insert lagging panels between beams as you dig, creating a continuous earth-retaining structure.
Key benefits include
- Reusability: Beams can serve multiple projects
- High load capacity: Ideal for deep excavations
- Space efficiency: Perfect for dense urban sites
- Adaptability: Works with varied soil types
Learn more about our soldier pile wall construction approach.
Plan your installation
Successful installations start with detailed planning. First, assess your site’s soil classification—clay, sand or mixed soils demand different support depths and spacing. Next, check for groundwater; if water is present, install dewatering or drainage measures. Finally, review local codes and excavation shoring regulations to confirm permit requirements.
Install soldier piles
Follow these steps to set your beams accurately and safely:
- Mark beam locations according to your engineered design.
- Drive each pile using vibratory or impact hammers to the required depth.
- Verify vertical alignment with a level or plumb bob.
- Brace the soldier piles temporarily until lagging panels are installed.
Prioritize site safety by cordoning off the area and using signage that meets your excavation safety measures.
Place lagging panels
As you excavate between piles, insert lagging panels to support the exposed soil face. Common materials include pressure-treated timber, precast concrete and steel.
Here’s how to keep panels secure:
- Trim panels to fit tightly between piles
- Stagger panel joints to prevent soil seepage
- Fasten panels with galvanized brackets or dowels
- Inspect each panel for damage before and after placement
For detailed steps, see our lagging panel installation process.
Monitor and maintain
Even after installation, you must keep an eye on your shoring wall. Set up a monitoring plan that includes
- Daily visual inspections for bulging or settlement
- Weekly readouts of any installed inclinometers
- Immediate repair of damaged or displaced panels
- Documentation of observations to meet excavation shoring best practices
Regular checks help you address minor issues before they become major delays.
Why choose us
- RuffHouse Construction LLC leads WA/OR in complex ground-support projects
- Our team follows OSHA-compliant procedures and tight timelines
- We leverage proven designs from soldier pile and lagging wall design experts
- You’ll get dedicated project management and on-site support
When you’re ready to secure your excavation with trusted experts, contact RuffHouse Construction LLC.
Frequently asked questions
What are soldier piles used for?
They form a strong, vertical support wall for deep or adjacent-structure excavations.
Which soils suit soldier pile systems?
Granular and cohesive soils both work, but you may need dewatering in high-groundwater zones.
How deep can I excavate safely?
With proper design and monitoring, soldier pile and lagging walls can support digs over 30 feet deep.
Do I need special permits?
Most jurisdictions require excavation and retention permits—check your local authorities and excavation shoring regulations.
How do I maintain my shoring wall?
Perform daily inspections, track any movement, and repair or reinforce panels as needed.
Ready to start your own soldier pile wall project in Seattle, Tacoma, or anywhere in Puget Sound?
Learn how Ruffhouse Construction delivers safe, code-compliant soldier pile and lagging wall installations for any site.
See our Soldier Pile Installation Services for details and request a free estimate today.