Understanding lagging panels
When you oversee a deep excavation project, you need a shoring system that ensures safety and efficiency. Mastering lagging panel wall construction ensures your site stays stable while you meet tight deadlines. In this guide, we’ll walk you through material selection, design considerations, installation steps, and maintenance best practices.
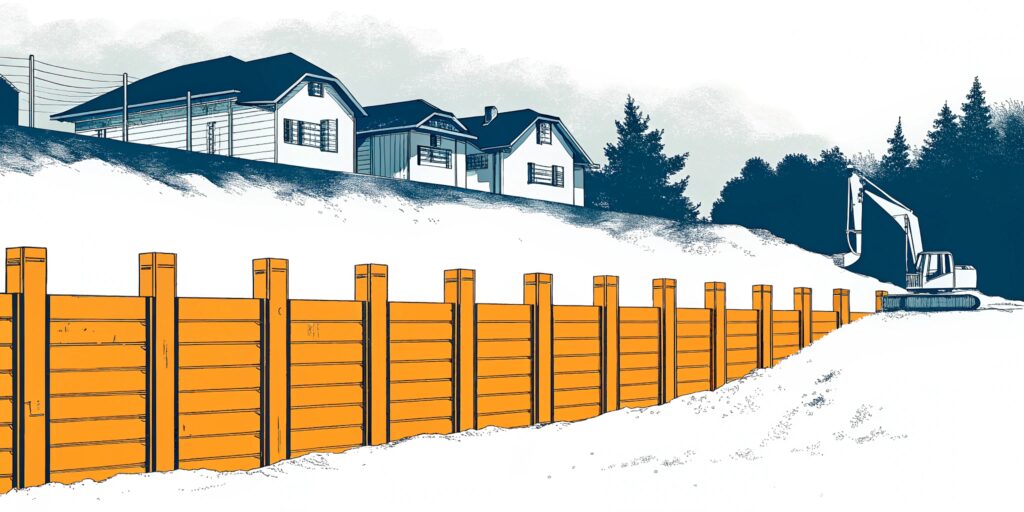
Lagging panel walls combine vertical soldier piles with horizontal lagging elements to hold back soil during excavation. This method dates back to the late 18th century in cities like New York and Berlin, proving its reliability in urban environments. You drive steel or concrete piles at set intervals, excavate in lifts, slide in panels, then backfill and compact each stage to transfer pressure to the piles. This approach is a core option within shoring systems for deep excavation.
Selecting panel materials
Your choice of lagging material affects wall performance, durability, and cost. Compare options in the table below:
| Material | Application | Pros | Cons |
|---|---|---|---|
| Timber lagging | Temporary walls | Low cost, fast installation | Lower stiffness, limited reuse |
| Precast concrete panel | Permanent walls | High durability, low maintenance | Higher upfront cost |
| Shotcrete lagging | Irregular soils | Conforms to complex profiles | Requires skilled labor |
| Steel plate lagging | High load scenarios | Superior strength, resilient | Higher material cost |
For short-term support, timber lagging remains the most cost-effective choice. For permanent projects, precast concrete panels deliver long-term durability and minimal upkeep. Explore lagging panel material options for full details.
Designing panel walls
Proper design sets you up for a safe, stable installation. Key factors include:
- Soil profile and lateral loads
- Panel thickness and type
- Pile embedment depth
- Bracing, tiebacks, and walers
Spacing typically ranges from 6 to 12 feet, with lift heights near 5 feet. Use reference charts like the Goldberg-Zoino chart to size timber lagging based on soil type and wall height. For formulas and case studies, see lagging panel design and soldier pile and lagging wall design.
Executing installation process
- Install soldier piles at predetermined spacing
- Excavate the first lift, typically around 5 feet
- Insert panels, align carefully, then secure in place
- Backfill and compact the void beneath each panel
- Repeat excavation and panel insertion until you reach final depth
- Add tiebacks or walers as required for deeper sections
Follow this lagging panel installation process and use calibrated excavation shoring equipment to ensure precise alignment and efficient progress.
Ensuring safety compliance
You must protect workers and surrounding structures at every stage. Implement dewatering if you work above the water table, and watch for signs of distress like panel deflection or cracks.
- Conduct daily inspections per excavation safety measures
- Maintain detailed logs of panel installation and backfill compaction
- Follow all local and federal shoring regulations
- Train crews on emergency response procedures
Complying with OSHA and state standards helps you avoid fines and keeps your project on schedule.
Maintaining panel integrity
Regular upkeep preserves wall performance and extends service life. Schedule formal inspections at least monthly and perform daily visual checks.
- Check panel joints and seals for movement or damage
- Verify backfill compaction levels after each lift
- Replace deteriorated timber lagging promptly
- Reinforce walls with additional supports if needed
Proper maintenance prevents unexpected repairs and downtime.
Managing construction costs
Accurate budgeting keeps your project on track. Major cost drivers include material choice, labor rates, equipment, and site conditions.
- Compare timber versus precast panel pricing
- Account for dewatering and tieback installation
- Include engineering, permitting, and inspection fees
- Allow contingency for unforeseen soil challenges
Refer to our lagging panel wall cost analysis for sample budgets and detailed line items.
Why choose us
- RuffHouse Construction LLC is the leading contractor in WA and OR for soldier pile and panel walls
- Over 20 years of experience delivering safe, on-time shoring solutions
- Local permit expertise ensures regulatory compliance without delays
- Proven track record with 500+ successful panel wall installations
- End-to-end support from initial planning through long-term maintenance
When you’re ready, reach out to RuffHouse Construction LLC to discuss how we can support your next panel wall project.
Frequently asked questions
-
What is the typical depth for lagging panel walls?
Depths commonly range from 10 to 60 feet, depending on soil conditions and design loads. -
Can I use this system in high water table sites?
Yes, but effective dewatering is essential to control groundwater during excavation. -
How often should I inspect the panel wall?
Perform formal inspections monthly and daily visual checks for displacement or leaks. -
Are precast panels reusable?
No. Precast panels are designed for permanent installations; timber lagging may be reused in temporary works. -
What factors affect overall cost?
Material selection, panel thickness, soil profile, and any additional bracing or tiebacks all impact the budget.
Ready to start your own soldier pile wall project in Seattle, Tacoma, or anywhere in Puget Sound?
Learn how Ruffhouse Construction delivers safe, code-compliant soldier pile and lagging wall installations for any site.
See our Soldier Pile Installation Services for details and request a free estimate today.